Organ Method IV
This follows directly—without a break—from the last sentence of last month’s column. The first part of this month’s excerpt is again aimed at the student who is new to the instrument, and I am trying to explain enough to enable that student to start to practice and learn, without making anything too complicated for the earliest days at the console. Everything here is presented in a simplified way that I hope is neither over-simplified nor inaccurate. The second part of this column is the beginning of the chapter on pedal playing.
The best way for any keyboard player new to the organ to begin to understand organ sounds—organ stops—and therefore to begin to feel comfortable with organ registration is indeed to pull stops out essentially at random and to listen. In order to do this efficiently and to get the most out of it you should start by following a few guidelines:
1) Make sure that you know which group of stop controls applies to which keyboard. (See below about
keyboard names.)
2) Start by drawing one 8′ stop—on any keyboard—and playing a few notes. (For this purpose, it doesn’t make the slightest difference what you play: if you are an absolute beginner, just play separate individual notes; if not, play something short and simple that you are comfortable with—a bit of a scale, chords, a passage from a piece, etc. Elaborate or fast passages are not better for this purpose, by any means.)
3) Draw a different 8′ stop on the same keyboard. Play a few notes. Listen for the sound: how does it compare to the first stop that you tried? Is it very different, somewhat different, or surprisingly similar?
4) Draw these two 8′ stops together. The combined sound will be louder than either of the two stops by itself, though not necessarily very much louder. It will create a different sonority. Does this combined sonority sound more different from one of the separate stops than from the other?
(Of course you can do this same exercise with further 8′ stops from this same keyboard, if there are any, and then with 8′ stops from other keyboards.)
5) Draw a 4′ stop from any keyboard. Play a few notes. Notice that this stop is an octave higher than the 8′ stop. Play a few notes in the octave below middle C, then play a few notes on an 8′ stop in the octave above middle C. Try some other 4′ stops—alone and in pairs or larger groupings if there are enough 4′ stops to make this possible. Pay attention to all of the different sonorities, noticing that, as long as you are only using 4′ stops, the pitch level of everything that you play is one octave above unison.
6) Draw out an 8′ stop and a 4′ stop together on the same keyboard. Listen to this sound, then try other combinations of 8′ + 4′, both on that keyboard and on others.
7) Draw out an 8′ stop along with anything higher-pitched, in any amount and combination: 4′, 22⁄3′, 2′, etc. Play some notes, chords, or passages, changing the higher-pitched component of the sound from time to time. As you do this, the sonority will change, but the sense of pitch level should not. Then, remove the 8′ stop. When you do this, the pitch level of what you are playing will jump up to the level of the lowest-pitched stop that remains in the stop combination that you have drawn.
Beyond these specific suggestions, however, you can simply play around with stops in any way that occurs to you or that you discover at random. It is only important, at this stage, that you be aware of the pitch designations: know whether you are playing an 8′ stop alone, something higher (or lower: 16′), or some combination. As I have said, very little about the organ is “always.” However, the pitch numbers are: what they mean is very specific and concrete, and it is always the same. In the later chapter on registration, I will discuss the more elastic situation regarding the stop names and the relationship of those names to sonorities and to musical applications.
Once you feel comfortable pulling out stop knobs, knowing that you can find sounds that are coherent and at the right pitch, you are close to being ready to start practicing organ. That is, you are almost ready to turn to Chapter 1 and beyond. However, there are just a few more things that you need to know about first.
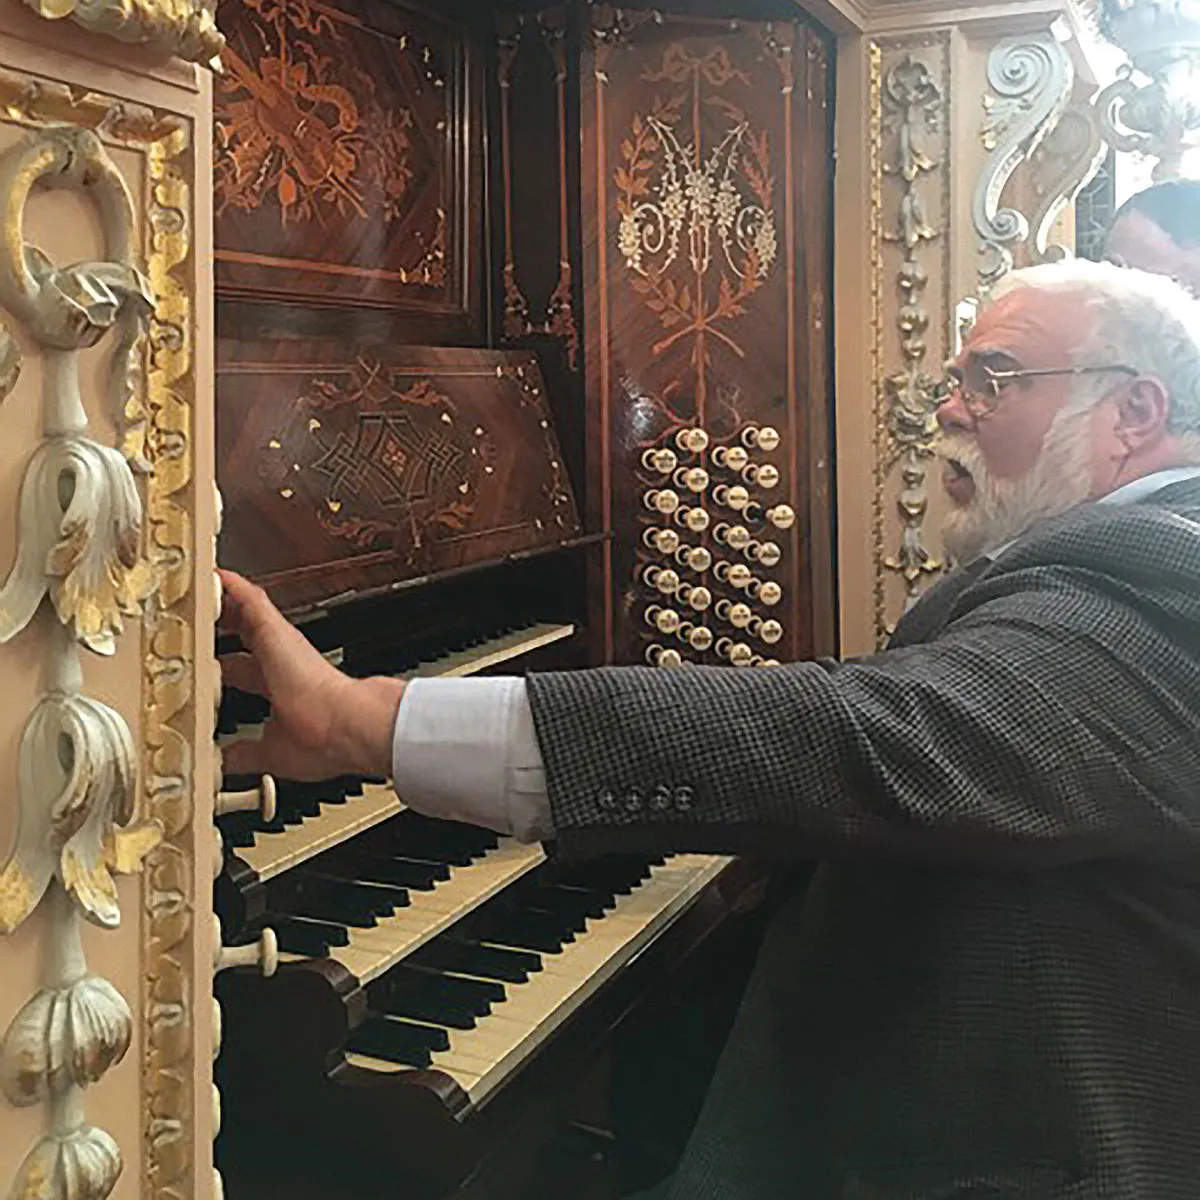
First of all, manual keyboards on most organs have names. The most common names in English are probably Great, Swell, Choir, and Positive (or Positif). Some organs in predominately English-speaking countries have keyboard names in other languages, with words such as Hauptwerk, Oberwerk, Rückpositiv, Brustwerk, Récit, Grand Orgue, and various others. On some organs—usually smaller ones—the keyboards have numbers rather than names. There is a lot to say about the history and meaning of these names and naming practices. Some of this can be found in later chapters of this book, along with suggestions for further research. However, for now you just need to note the names of the keyboards on any organ that you are using, and correlate that name with that keyboard’s group of stop controls.
Along with the stop knobs—or tabs, or buttons, or whatever it is—there are controls, similar in look to the stop controls, that do things that are a little bit different. Some knobs or tabs are labeled with something like this: “Swell to Great” or “II/I” or “CH to GT,” that is, with names, numbers or abbreviations that refer to whole keyboards. These are couplers, and they are one of the ways in which stops proper to one keyboard can be shared by a different keyboard. What they mean, specifically, is usually dictated by common sense. If a knob says “Swell to Great,” then drawing that knob causes any stops that are drawn on the Swell keyboard to be playable also from the Great keyboard. There are couplers bringing the stops of manual keyboards to the pedal keyboard—“Swell to Pedal” or “I/Ped,” for example. Couplers bringing the pedal stops to a manual keyboard—“Pedal to Great,” say—are extremely rare, though not impossible or unheard of. Most organs have several couplers, but do not have all of the couplers that might be possible in theory.
Couplers are sometimes controlled by toe studs or pedals of some sort. There is also sometimes duplication: a coupler will be controlled both by a button or knob of some sort and by a toe stud. This is just for convenience. Don’t be worried by it: if two controls appear to do the same thing as each other, they are probably meant to do so.
Many organs have rows of buttons—usually between the keyboards—and/or toe studs—above the pedal keyboard—that are numbered with Arabic numerals. These are combination pistons. They operate to turn on pre-selected groups of stops, turning off all of the other stops. When you first sit down at an organ, try pushing the combination pistons one at a time. Observe the stop controls going on and off as you do so, and try out the resulting sounds. It is likely that any organists who use this instrument regularly have set up the pistons to bring on combinations of stops that they have found particularly useful, though as it is usually quite easy to change the combinations, the ones that you find have not necessarily been there very long, and are not necessarily intended to be used very much or for very long. The proprietor of the organ that you are using can show you how to set combinations of your own if and when that becomes relevant.
A stop control that is labeled “Tremulant” or some variation of that word does not bring on an organ sound of its own. Instead, it gives a vibrato-like quality to the stops that are drawn. (There are several different mechanisms for making this happen.) A tremulant may apply to the whole instrument or to one division.
Many organs have pedals that are not keys on a keyboard, that are set above the pedal keyboard itself, and that more or less resemble gas pedals in cars. These have two main functions, both intended to alter the sound that the instrument is making. The more common type of pedal is called the swell pedal—or sometime the “expression pedal.” It makes sounds louder or softer. On a pipe organ, this can only be accomplished by enclosing pipes in a box, and creating a setup for opening and closing that box. Many organs have this arrangement for some or, less commonly, all of the divisions. On an electronic organ, the loud/soft technology is analogous to the ordinary volume control on a stereo. When the swell pedal is all the way up—the top of it as far from the player as it goes—the sound is at its loudest, the same volume that it would have if there were no swell pedal. When it is all the way down—the top as close to the player as possible—the sound is at its softest. Some organ music explicitly calls for the use of the swell pedal; much of the repertoire does not.
The other sort of pedal that affects the sound of the instrument is the crescendo pedal. This is a device that brings on combinations of stops in a pre-determined order, quiet to loud. If the crescendo pedal is all the way down, it has no influence on the sound. As it is moved towards the up position, it brings on more and more stops. When it is all the way at the top, it has engaged a loud registration. The order in which stops are brought on is set either by the organ builder or by someone else, prior to the player’s sitting down to play. There is some organ music that expressly calls for the use of crescendo and diminuendo made by adding or subtracting stops in the manner of a crescendo pedal: most organ music does not. Many organs do not have a crescendo pedal.
To a large extent, the point of learning a little bit about these features and devices as you first sit down at the organ is to make sure that they do not confuse you as you begin to practice and to become adept at the basics of actually playing organ. For example, if you are certain that you have only one quiet stop drawn, but you are hearing a very loud, brash sound, you should know to check whether the crescendo pedal is really all the way off. If you think the sound you are playing should be loud, but it is in fact rather soft, check the swell pedal. If you move your legs around a bit, and suddenly the position of all of the stop knobs change, you might suspect that you have accidently hit a toe stud combination piston.
For the earliest stages of practicing and learning the organ, you need to work directly with the stop controls and the keyboards. That is not to say, by any means, that you can’t experiment with the swell pedal, couplers, and all the rest. However, it is as you get to know the instrument better and better, and start to work on organ repertoire, that you will explore all of this and more in greater and greater detail and complexity.
One more thing: the bench itself.
An organ bench should be adjustable in two directions: up and down, and back and forth. I have never seen an organ bench that couldn’t be slid back and forth at least a bit. Some benches can be moved up and down with a crank or other device that is built in. Others are, so to speak, solid. These should be provided with blocks. There are clever organ bench block designs that build different heights into the same blocks oriented differently. Some organ benches have multiple blocks that can be used separately or together. It is extremely important that blocks, and the bench as a whole, be stable: not rickety or inclined to wobble. If they are, this should be fixed. It is unlikely, though not impossible, that an organ bench would actually fall over. However, a wobbly bench makes playing more difficult, and can lead to physical tension for the player who has to struggle to remain in the right orientation to the keyboards.
If the bench seems all right, sit down and look towards your feet!
Chapter 1: Pedal Playing
Organ playing that includes pedals involves the whole body. It is one of the most athletic of musical performance activities, and therefore it is especially important that it be carried out comfortably, without tension. It is important, in other words, that it be done correctly. However, it is important to understand that it has to be done in a way that is correct for each player, and that this will not necessarily be the same for everyone. Different bench heights, postures, positions of the legs and feet, and, to some extent, technical practices will be right for different students. This is true even before we think about differences in musical goals, since it arises at least in part out of the differences in physical type of different people who want to play organ. Those differences in musical goals also play a part in determining aspects of the type of pedal technique that a player needs to develop. However, a student new to the instrument cannot yet (or at least probably should not yet) know exactly what those goals are going to be or where his or her involvement with the instrument may lead.
On any given organ the distance between the pedal keys and the manual keys is fixed by the builder long before anyone sits down at the instrument. This distance is important, since it determines the way in which your height above the pedal keys affects your orientation to the manual keyboards. The height of the bench—that is, of the player sitting on the bench—above the pedal keys is important. It is difficult to play the pedal keyboard comfortably if that height is wrong. If it is too low, then you have to hold your feet and legs up artificially in order to avoid playing notes by accident. This is a great source of tension, and it is very important not to let it happen. If you are sitting too high, then it can be hard to reach notes easily with simple, comfortable gestures of the feet, especially with the heels. This can also destabilize your manual playing, since it can lead to a slight but annoying sense that you might be about to fall forward.
However, on the whole, sitting too high is usually less of a problem than sitting too low. You will discover, as you play more and more, what bench height is best for you. Initially, you should adjust the bench in such a way that if you relax your legs entirely—especially the big muscles above the knees—the bottoms of your toes just barely touch the tops of the natural keys, and your heels don’t. This is just a starting point. You will see, as the process of learning pedal playing proceeds, how to determine what changes to make in this, if any.
You should start out centered on the bench—along the left-to-right (or bass-to-treble) axis—and positioned on the front-to-back axis in such a way that you feel stable. (This may also be essentially centered, but it need not be. This will depend on the depth of the bench, as well as the way that the size of the bench relates to your own size.) You should sit comfortably. This is extraordinarily important. It is neither practical for playing nor healthy for the player to slump far forward or to lean to one side or the other while trying to play. However, it is also neither necessary nor healthy to sit in a way that is stiff or artificially tall, or with the shoulders, back, and arms under any tension, or with your legs or knees so close together that you need to work to maintain the position.
As soon as you have sat upon the organ bench in what you think of as a good position, with the bench at a good starting height, take a few deep but relaxed breaths. Then look down at the pedal keyboard. Notice what note appears to be directly below your nose. Notice what note appears to be directly below each of your feet. For the purpose of learning to play pedals, this should be the last time that you look down at the pedal keyboard or at your feet while playing the organ.
I will end here, for reasons of space. Next month I will continue with the discussion of pedal playing, and introduce beginning pedal exercises.
Related Articles